In the previous article, the Todo tool we had the AI build was already finished, just like the image below. It completed the task, we can preview the result, and if there are no problems, we can continue iterating.
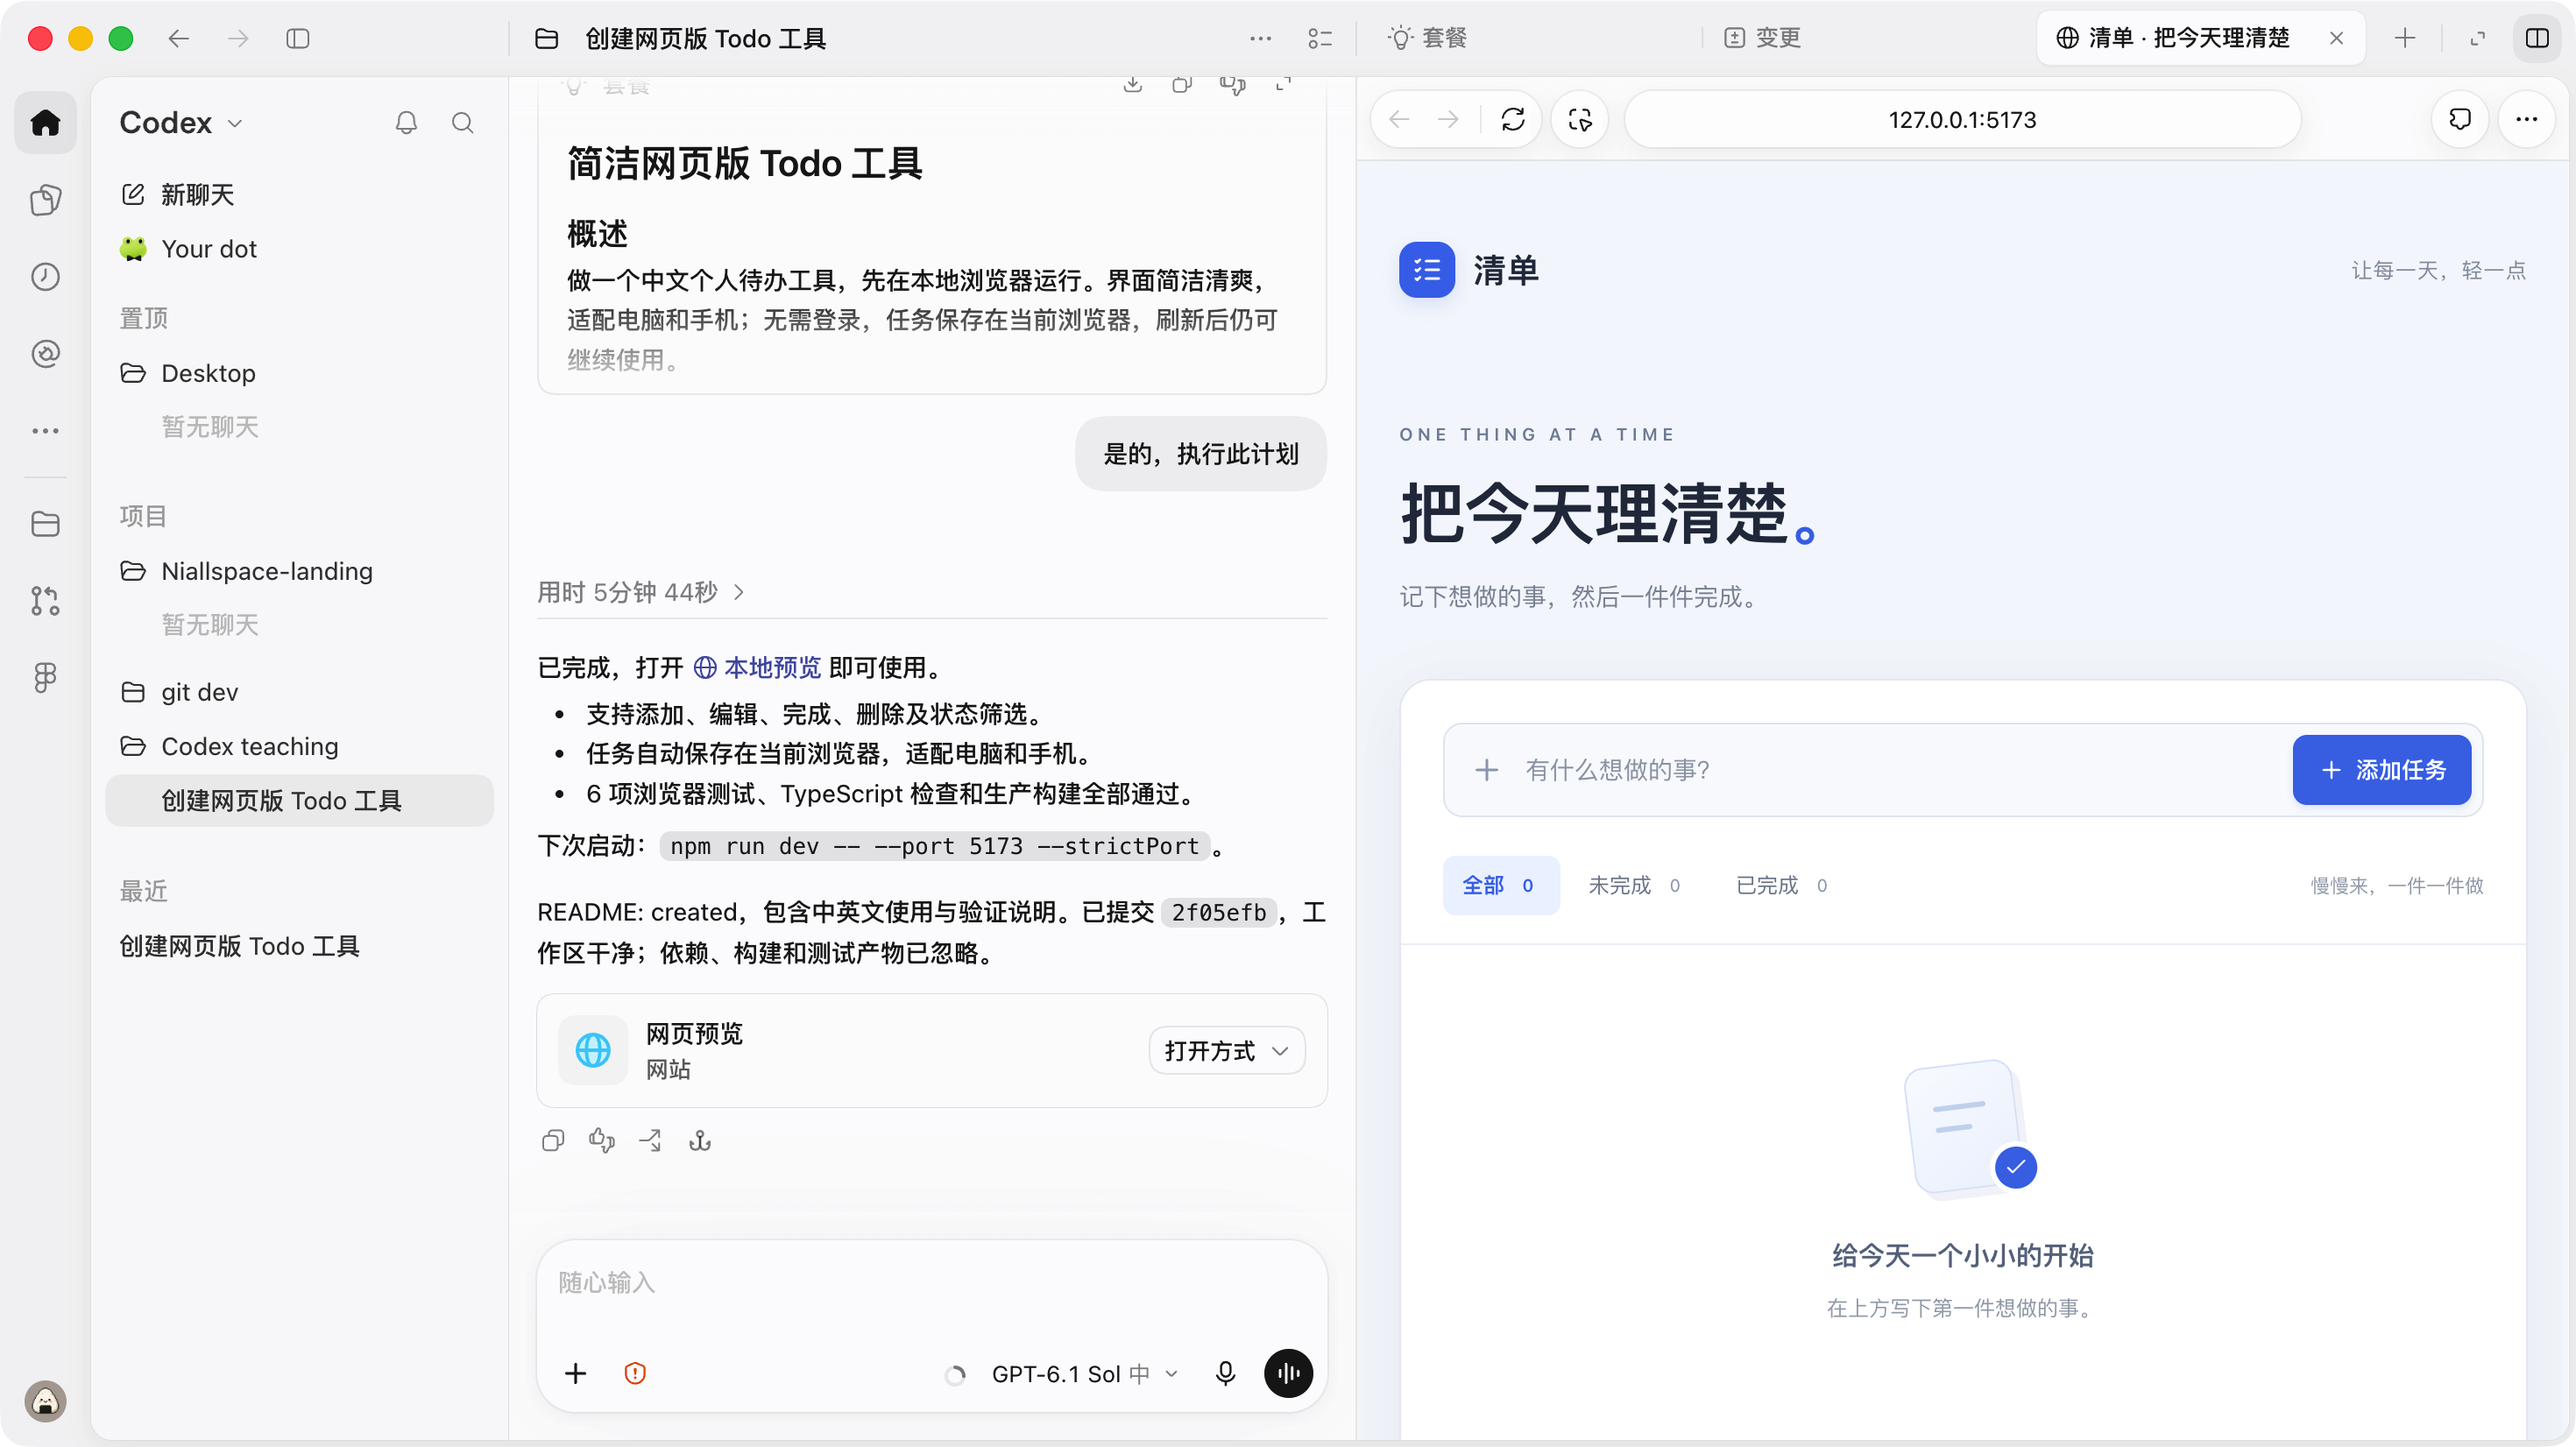
But,if we break something and want to return to the current version, or if we want to switch to another device to write, or if we now need to collaborate with others, what should we do?
This is why the Git repository is initialized when creating the first project; using Git commands can solve the problems mentioned above.
Git commit
There are many ways to commit in Git in the Codex App. The Codex App provides a very user-friendly GUI commit method, and we will introduce them separately in different situations.
Commit using the GUI
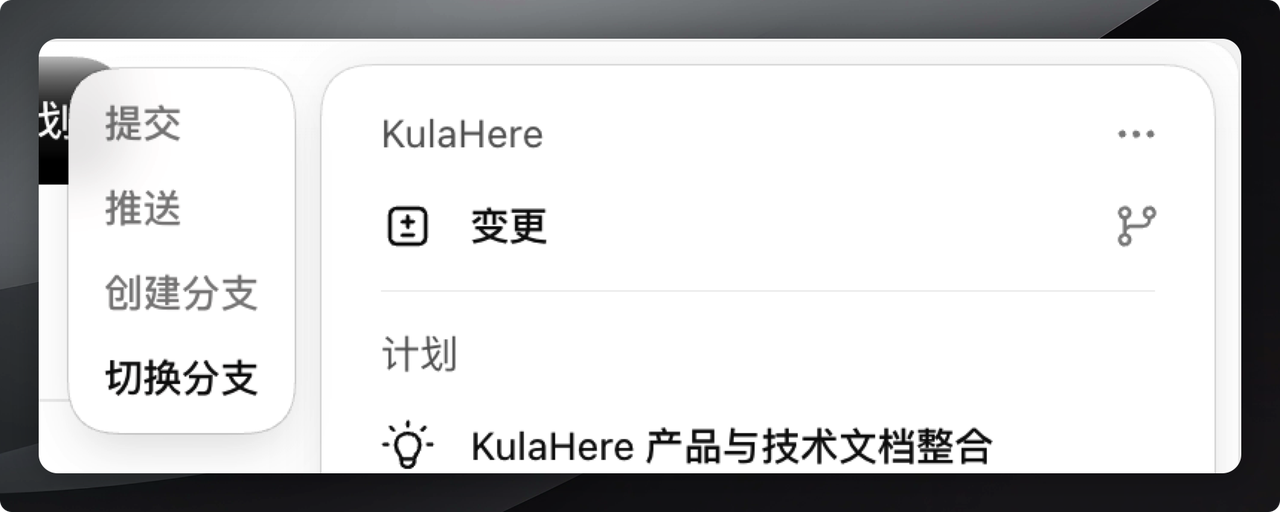
In the "Creating Your First Project" article, we showed you how to view Git branches; the push and commit operations are also described there—clicking them automatically triggers a commit.
Commit via terminal command line
This method is unaffected by thread state; just open a terminal and enter 2 Git commands.
git add .git commit -m "提交的内容"If you want to be more standardized, you can refer to commit conventions used in development and add an English word in front to indicate the type of update in this commit:
feat: new feature, new capability
fix: fix a bug
perf: change code to improve performance (optimize program performance without affecting the code's internal behavior)
refactor: code refactoring (refactoring,modify code without affecting the code's internal behavior or functionality)
docs: documentation changes
style: code formatting changes; note this is not CSS changes (for example, semicolon changes)
test: Add and modify test cases
build: Changes that affect the project build or dependencies
revert: Revert the previous commit
ci: Changes to continuous integration-related files
chore: Other changes (changes not covered by the above types)
release: Release a new version
workflow: Changes to workflow-related files
Of course, if you use AI to help you make commits, you can also send this content to the AI.
Use AI to help us commit code
Of course, you can absolutely hand this kind of simple operation over to AI; it will just take a bit more time and consume a few more tokens.
帮我把改动提交到 Git 仓库Advanced operations
You can also create a Skill to have Codex automatically commit the changed code after every code change. For example, the Skill Gitwork I created (repository link: https://github.com/Niall-Young/Gitwork). If you want to use it, you can use my Skill directly.
View commit logs
Currently, commit logs can only be viewed through the terminal command line, or by asking the AI to tell us. The terminal command is as follows; enter it to see all Git commit logs.
git logThen, you will see the commit records shown in the figure below. In our test project, we have only one commit, so you can see only one commit record.

We will notice a yellow string above. This is a hash value, which is unique for each commit,if we need to roll back the version, we need to use this.
Roll back the version
If we mess up the project while continuing to iterate, what should we do? We can roll back the Git version. You can directly ask Codex to do it for you, for example by writing a prompt like this.
帮我把这些改动回滚到上一个 Git 提交版本You can also use Git terminal commands to do this.
git reset --hard 之前的哈希值复制到这里This will roll the project code back to this version. However, note that after rolling back, the current branch will no longer contain commits after this version, so it is very important to manage Git versions well and increase commit frequency.
Push code to the remote repository
The reason we discuss pushing later is that it is performed after committing, and its frequency is usually lower than committing. More importantly, pushing is relatively troublesome and requires some preparation; here I suggest you just let AI do it for you.
This article takes pushing to GitHub, the most common cloud-based Git repository management product, as an example; other enterprise applications such as GitLab are largely the same.
Preparation
Pushing cannot be completed by just typing one command; you must first do some preparation. First is obtaining a GitHub PAT, i.e., a personal access token.
Obtain a PAT
First, you need to go to this website:
[Feishu content not yet supported: type 999]
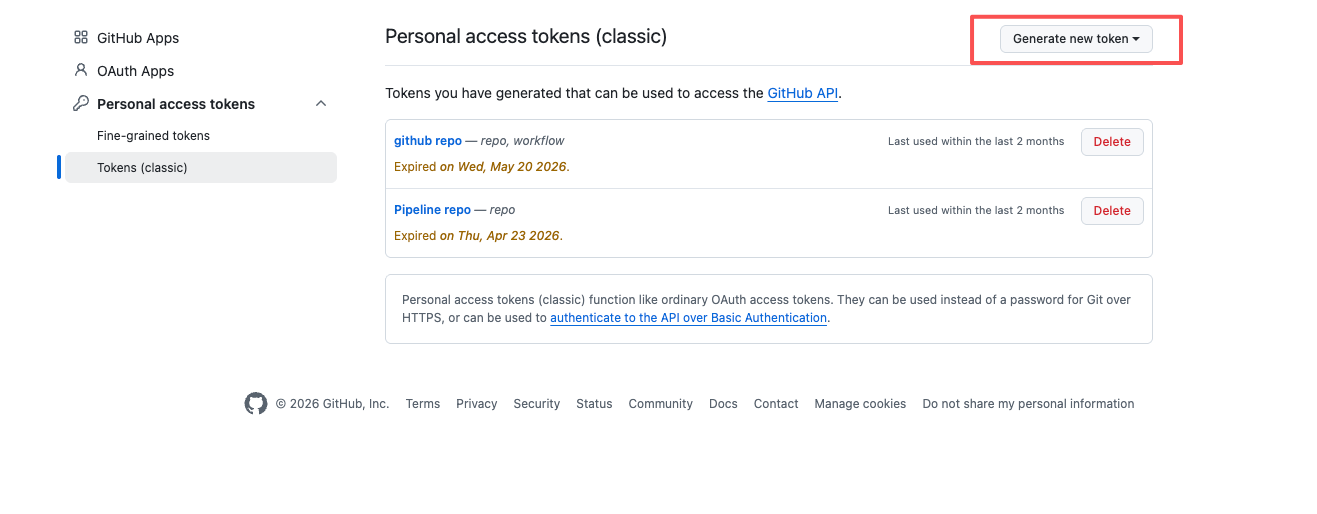
On this website, you need to create a new personal access token (PAT); click New as shown in the figure.
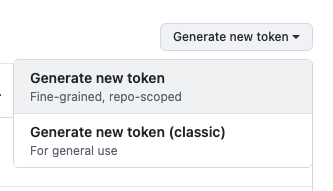
Here you can select the first option, as shown below.
Then the Token name and description can be customized; the key is the content below, where you must check the boxes according to the screenshot below.
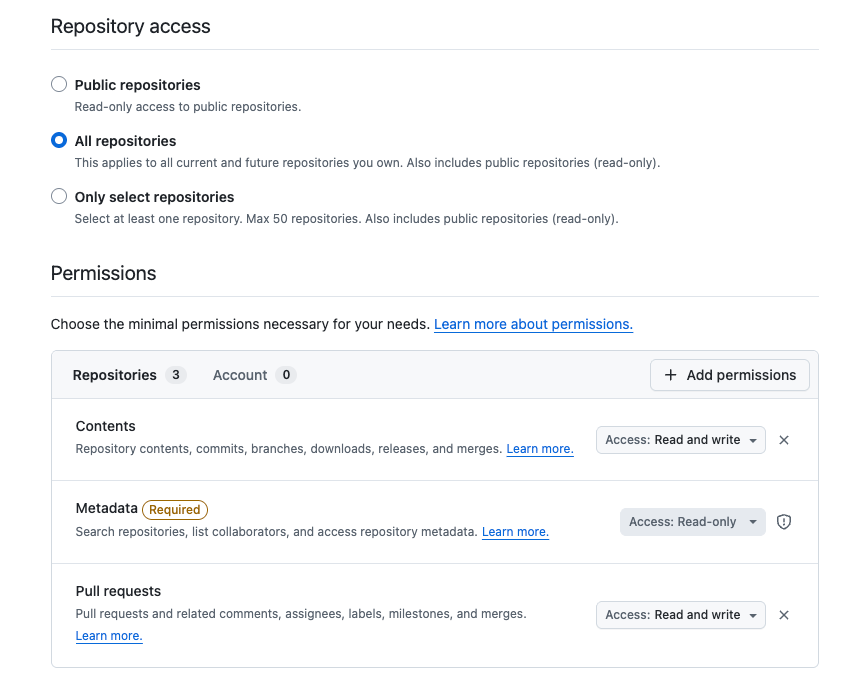
Then click Create Token, and copythis Token(Please make sure to save it, as you won't be able to see it again laterthis Token)。
Create a GitHub repository
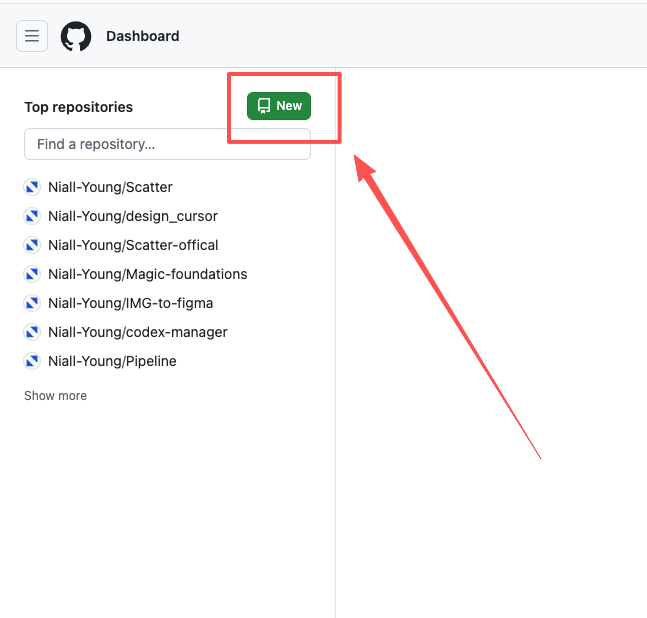
You also need to create a repository on GitHub. As shown below, click the button to enter the repository creation configuration page.
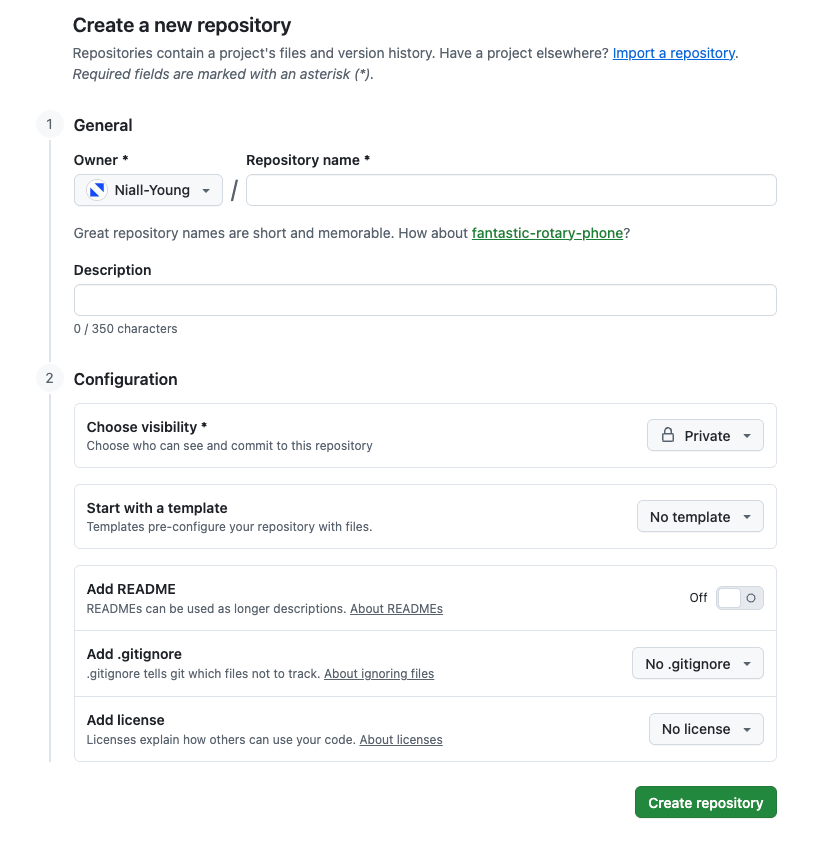
Then configure the name and description here. You can create a private repository or a public repository; anyone with the link can access a public repository. Note that you should not add a README document here.
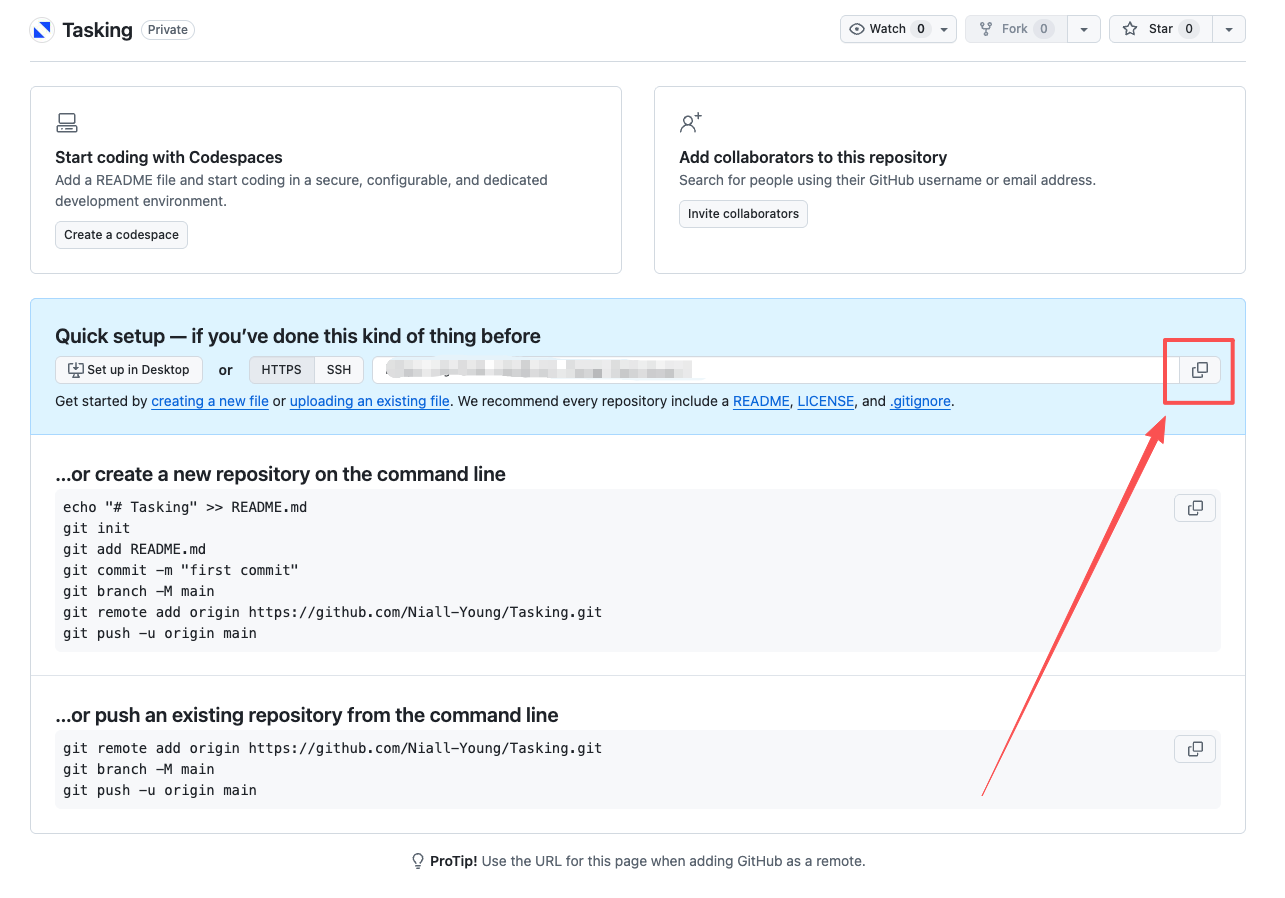
Then you will enter the page shown below. Click the copy button to copy the HTTPS link of the repository.
Push code
Pushing can only upload code that has already been committed to the Git repository; if there are changes that have not been committed, those changes will not be pushed.
Associate a GitHub remote repository
First, you need to enter the following Git command in the terminal to associate the remote repository.
git remote add origin 刚才复制的 HTTPS 链接Then you only need this one command.
git push -u origin mainThen wait for the push to complete.
Subsequent pushes
The above operations only need to be performed once for a Git repository, that is, one project, and do not need to be repeated. Future pushes can be simplified to the following command.
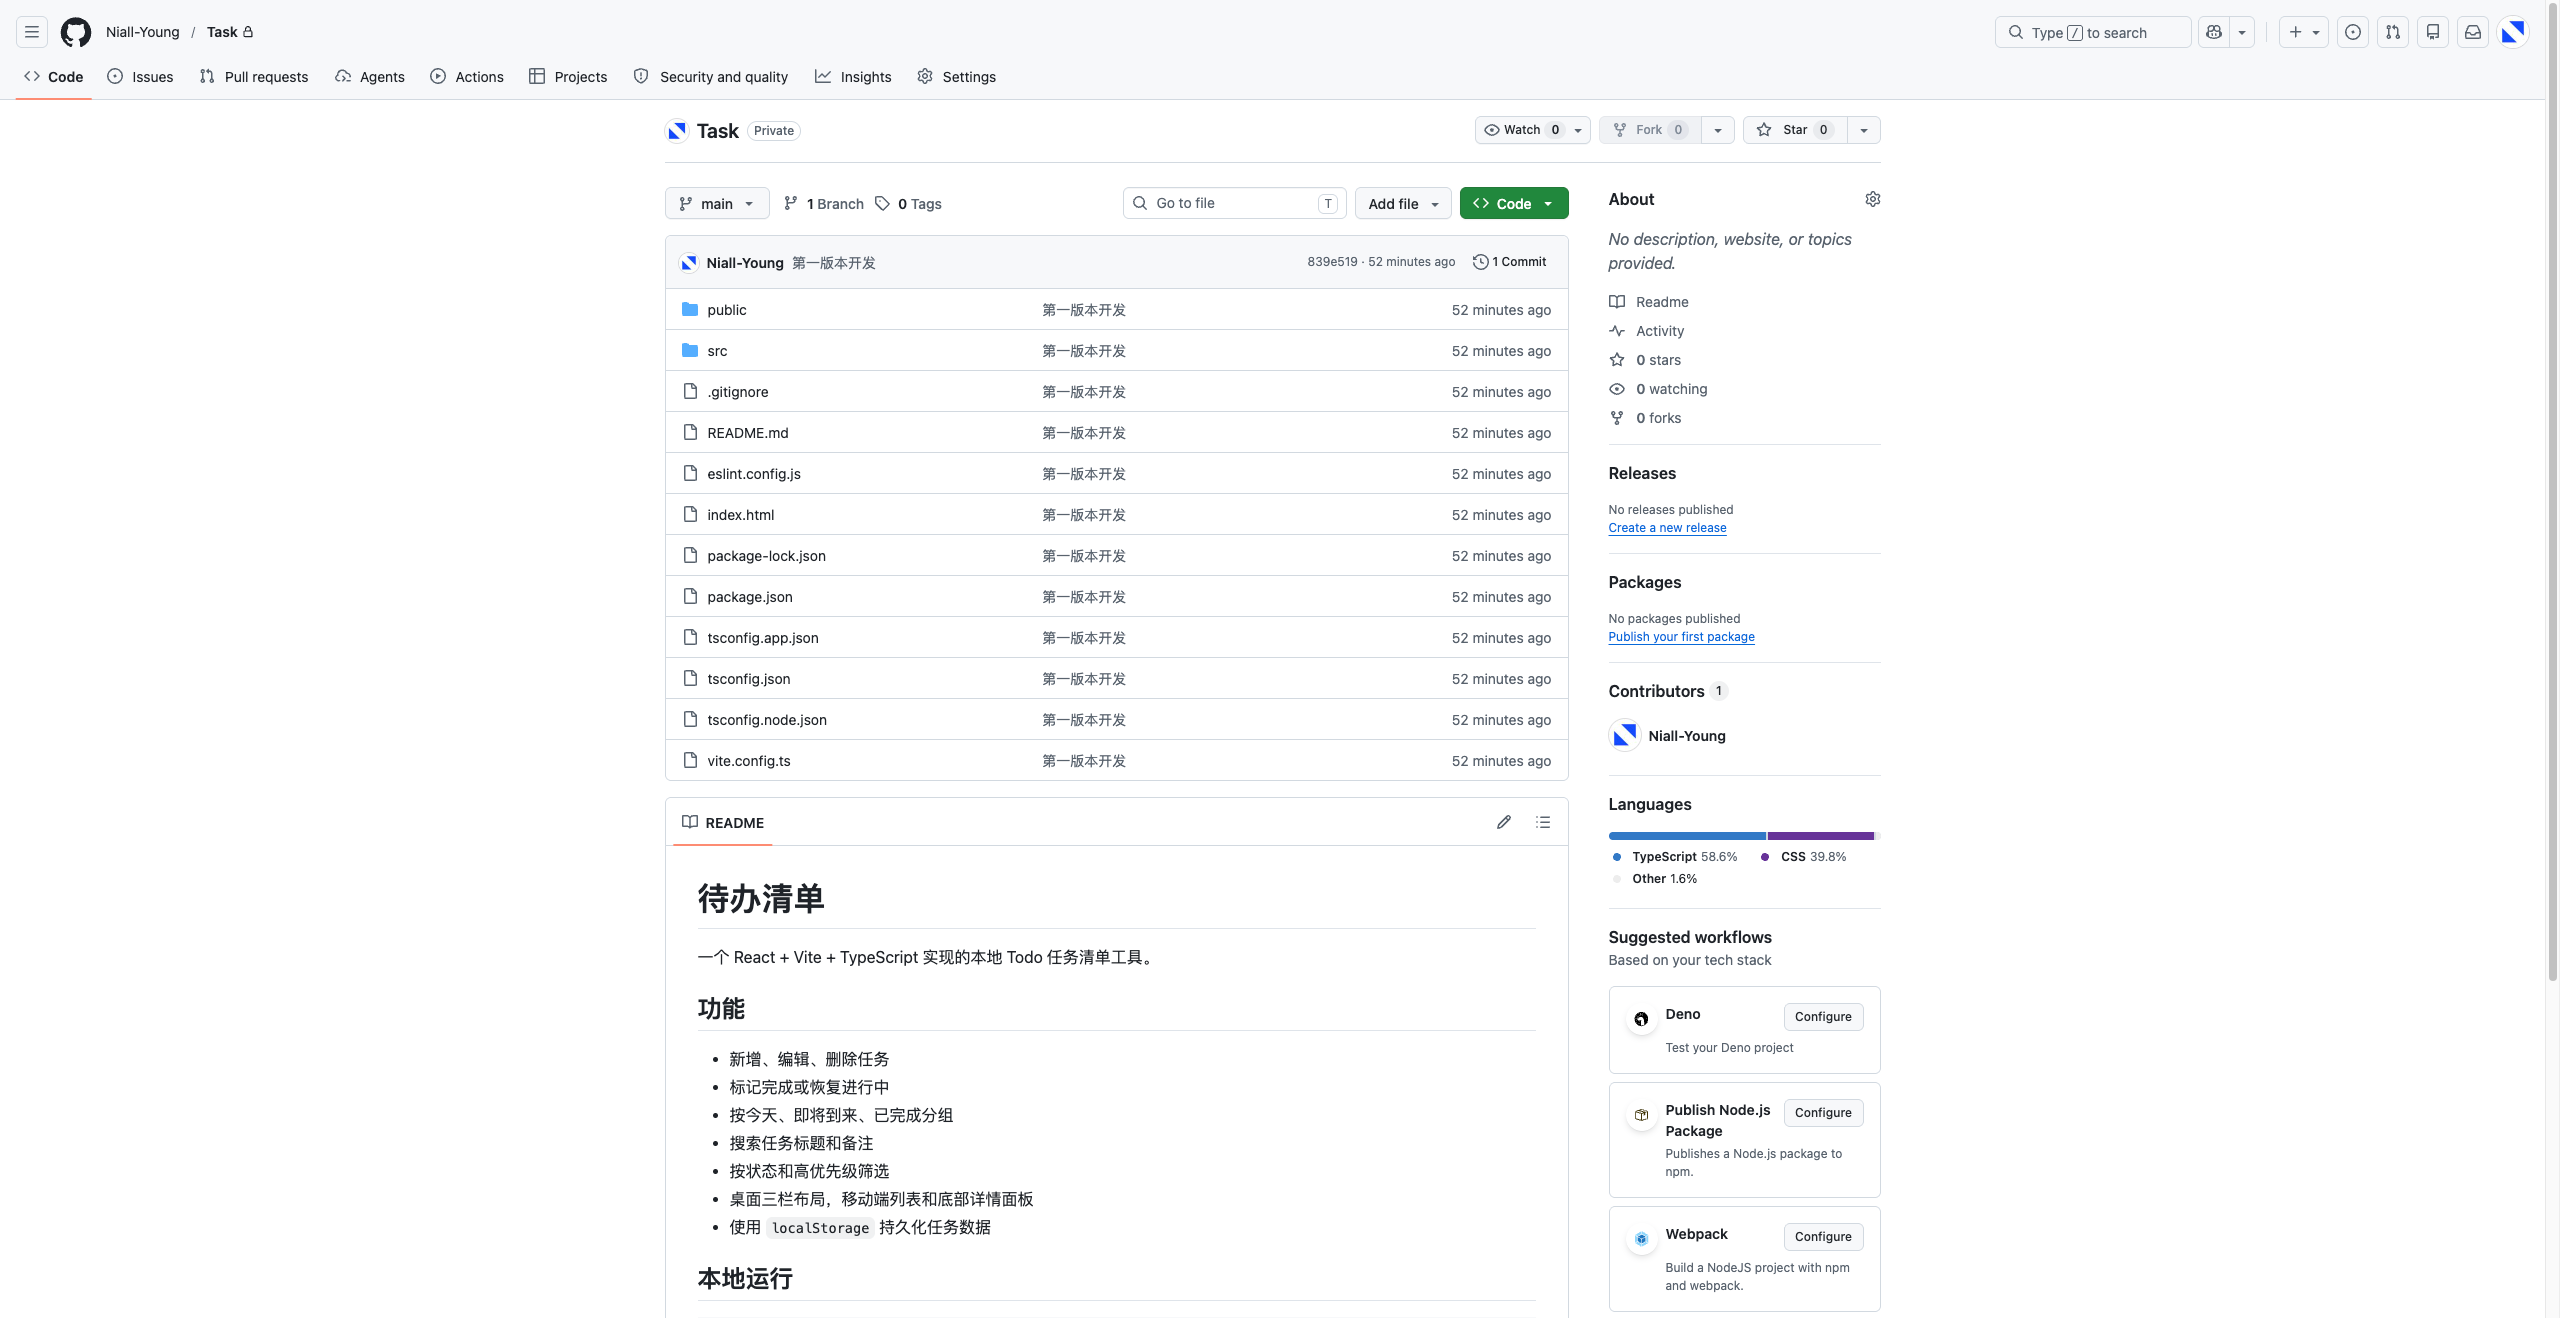
git pushAfter the push is complete, you can find this repository on GitHub and see all the code that has been pushed.
Pull code
Now you have pushed the code to GitHub, and the code has also been stored in the cloud. On any new device, as long as there is network access and you log in to your GitHub account, you can pull the code from the cloud to the local machine for development. Similarly, if other people have your consent, they can also pull code or push new code to collaborate.
So, how do you do it?
Do it using the terminal command line
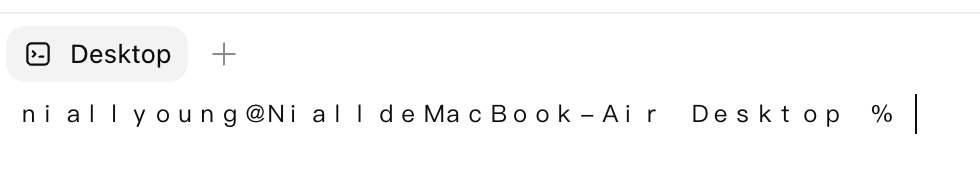
In the command line, first you need to find the path of the target location, for example, the desktop.
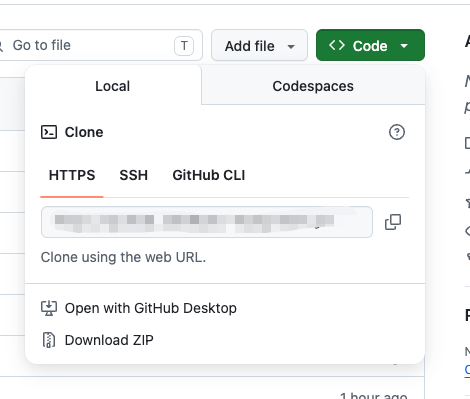
Then copy the HTTPS link from the GitHub repository, as shown in the following figure:
Then enter the following command:
git clone 你仓库的 HTTPSAnd then it was cloned.
Operating directly with AI
Of course, it's the same as before: you can use AI to directly clone the repository into the corresponding file directory.
帮我把「你的仓库链接或者 HTTPS URL」克隆到 xxx 文件夹下Next step
Now we know how to fully connect our code with GitHub and get GitHub and Codex working together, but having to commit every time is really inconvenient.If we give a prompt, for example:
每次更新迭代,你都需要执行 Git 提交命令来提交代码But this only works within one thread and can't take effect in all conversations. Is there any way to make the AI follow it every time?
50 likes
You can like once today